Chrome
Let’s get you started with your ChromeOS media player
ChromeOS devices with Kiosk mode for seamless startup and remote management via Google's Admin Console. Elevate your signage experience effortlessly.
Create Your User
Go sign up at my.playsignage.com, using Facebook, Google, Microsoft, or simply a username and password.
Watch the video
Download the APP
Install our app from Chrome web store.
NB! Since March 2023 chrome apps can no longer be launched on regular PC's, only ChromeOS devices can launch chrome apps.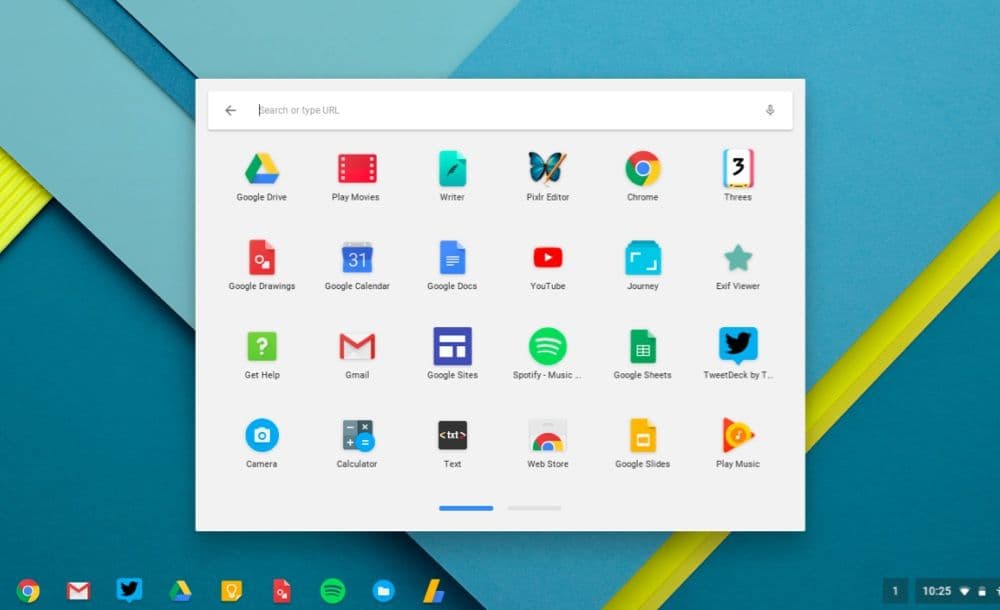
Link the Screen
Log in at my.playsignage.com, then go to Screens -> Add screen, and use the code from the TV to link the Screen to your account.
Watch the video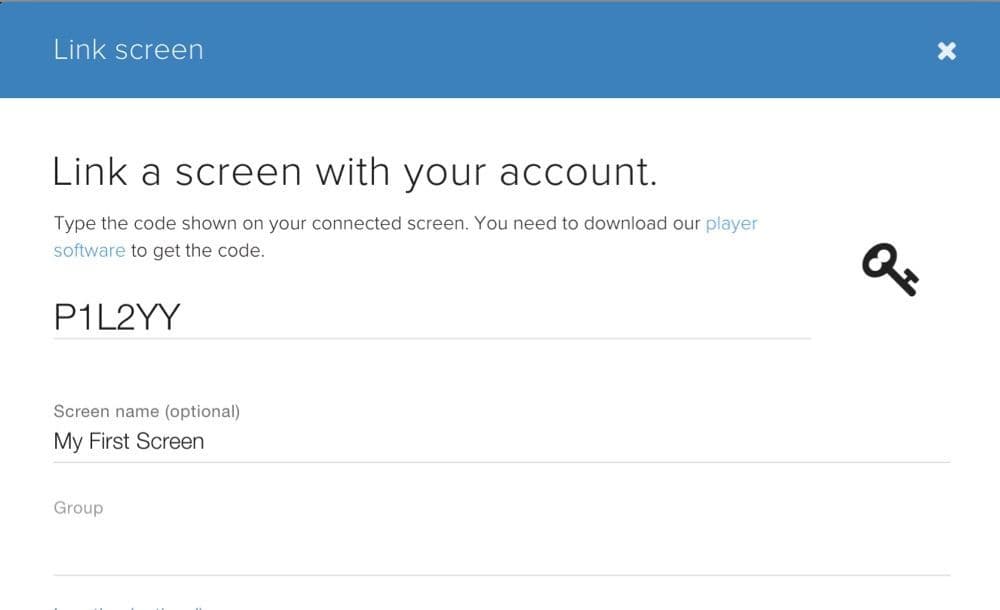
Design your Content
It’s time to get creative. Assuming you’re already logged in, go to Playlists, create a playlist, and start designing your content.
Watch the video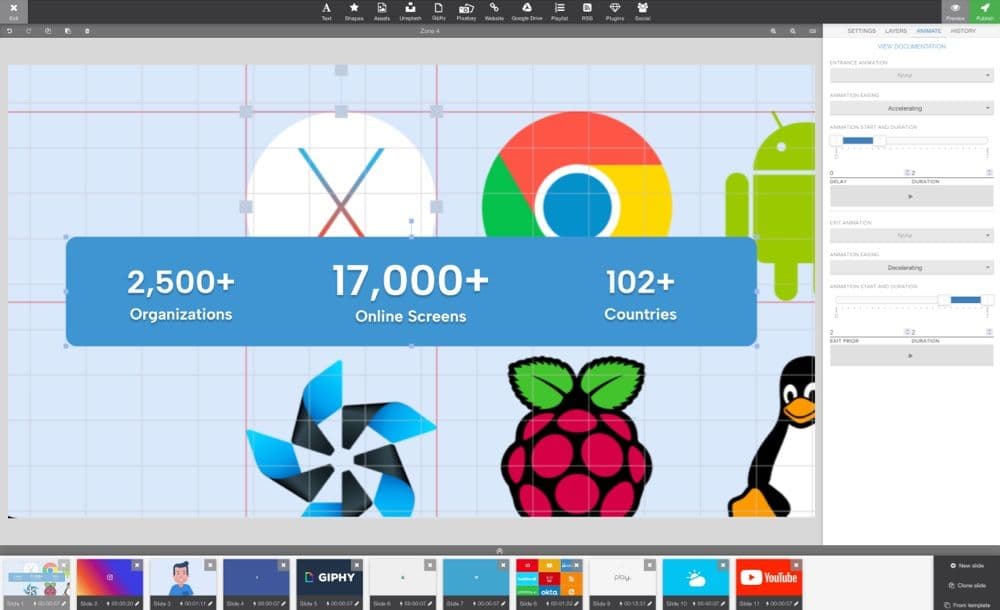
Link your Playlist
The last step is linking your content to your screen. Go to Groups & Schedules, pick your playlist in the group’s base playlist, then drag and drop your screen to the group and click Publish.
Watch the video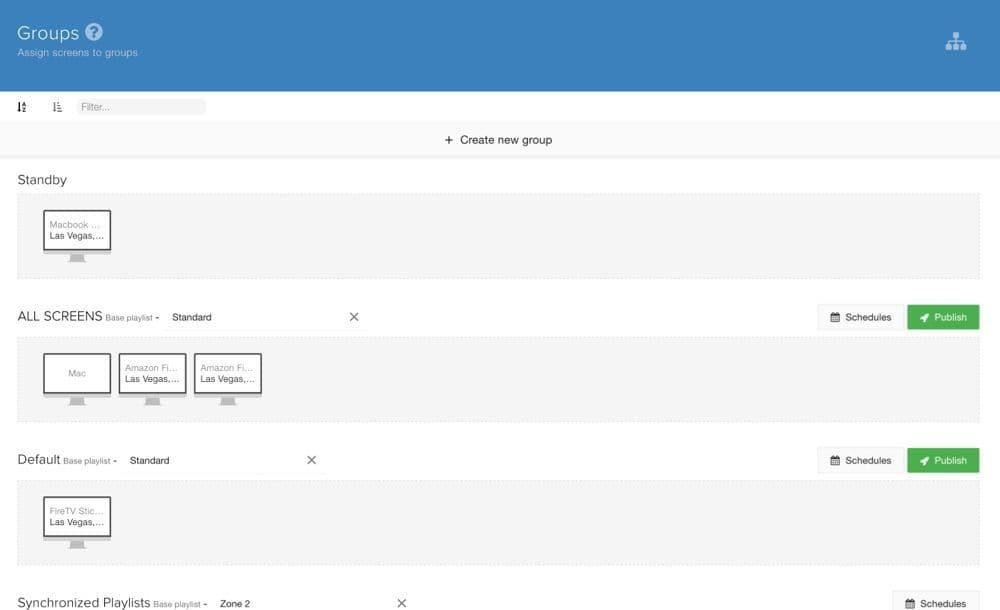
Stuff you should know
We've gathered some of the most common features that you may need to get your Chrome media player up and running smooth.
- June 2022: Chrome Web Store will stop offering Chrome App installations for Windows, Mac, and Linux users.
- July 2022: End support for Chrome Apps on Windows, Mac, and Linux.
- March 2023: Chrome Apps will no longer be launchable on Windows, Mac, and Linux.
- January 2025: End support for Chrome Apps on ChromeOS.
We recommend using our PWA app when the time comes and Chrome OS can't do the job. Here's a link to the app itself, PWA
Chrome digital signage comes in two flavors
- As an extension on Chrome Browser – great for testing, but we recommend using a native Windows / Mac / Linux for production instead of a native application that can auto-start and recover from a crash.
- As an extension on ChromeOS device – a device running an operating system developed by Google. ChromeOS devices can be configured to run in Kiosk mode so that they can launch our app on device startup and keep it running. ChromeOS devices can also be remotely managed (restart, take a screenshot, etc…) from Google’s Admin Console.
Working with Chrome Device Management
For those wanting a higher level of management and monitoring, you should be looking into Google’s Chrome Device Management. Adding your devices to Chrome Device Management, amongst other features, adds the feature of KIOSK mode on all your Chrome devices.
How to set up Chrome Device Management.Below you will find hints and instructions on how to set up and manage your devices.
- You need to be super admin to be able to use add devices in Google Admin
- You need to wipe the device before trying to add the device
Follow Google’s instructions on how to add your Chrome devices to your account.
Managing and monitoring your Chrome devices
When your Chrome device has been added you have tools for managing and monitoring your devices directly from your account.
- Reboot the device
- Take a snapshot
- Set the volume
- Disable the device
In addition, you will find hardware information as well as health stuff for all your devices.
Adding Play Digital Signage in KIOSK mode
To add Play Digital Signage to your devices you need to add our app and set it as the default KIOSK app.
- Click Apps & extensions in the upper menu bar
- Then click Kiosk (Users & Browsers, Kiosk, Managed Guest Sessions).
- Hit the add button in the lower right corner
- Click Add from Chrome Webstore.
- In the top right search for Play Digital Signage and hit enter.
- When you’ve found our app click Select.
- After adding the app you need to choose it in the Auto-lunch app and you’re good to go.
When you’re done you should be able to reboot the device from your account, the device is not going to ask for a username and password and the app will auto-launch. In fact, you don’t need to do anything.
In case you’re not already using Chrome, you can download it from the official website.
Find the Play Digital Signage extension in the Chrome web store and click Add to Chrome. The extension will be available in the Apps drawer after download.
If you’ve purchased a Chrome OS device, you can set it up using a regular browser extension as described above. However, we recommend setting it up in kiosk mode instead. Setting up a kiosk may take slightly more time but it is worth it as the kiosk mode will start the player app on system start and will ensure that the extension is always running.
1. Wipe the device and set it to development mode
Before starting you need to wipe your device. See per device instructions here.
IMPORTANT! Keep the device in developer mode (don’t go back to verified mode after wiping).2. Turn on kiosk mode
After the wipe is complete, connect to a network & accept the terms but DO NOT login yet.
Press CTRL + ALT + K to enable kiosk mode.
3. Login and install our extension
You can now log in (you might need to create a new Google account). Install the player app from the Chrome web store.
4. Enable on-screen keyboard (optional)
Go to device Settings -> Accessibility and tick the ‘On-screen keyboard’ option if you plan to use this device with a touch screen.
5. Enable auto-play (optional)
If you plan on displaying content from YouTube, there’s one additional set to change. You’ll find the instructions in the plugin FAQ section.
6. Turn on developer mode and set app to auto-launch
Open your browser & go to the extensions page from the settings menu (you can also type chrome://extensions to the address bar):
- On the extensions page, tick ‘developer mode’ on the top right.
- Copy the extension ID (you may need to scroll down a bit).
- Scroll back to the top of the page and click ‘Manage kiosk applications’.
- Enter the copied extension id and click ‘add’.
- Press on the newly added row (or hover to highlight) and click on ‘Set to auto-launch.
- Reboot your device.
After rebooting, you will be asked to confirm that the extension should automatically start when the machine turns on. Click ‘confirm’ and you’re done.
Options & FAQ
Options can be accessed directly on the TV by using OPTIONS.
Options can be accessed directly by the player or in settings for your player.
- Launch player on startup - Toggle this ON to make sure our APP starts when your player starts up, for example after a power outage.
- Show top menu bar - Toggle this ON if you want the top bar to appear when moving the mouse or using the remote for your player. Toggle this OFF if you want a kiosk experience where users can't exit the app by clicking the exit button on the top menu bar. You can still access the menu with the "Ctrl + o" command.
- Optimize for touchscreen - Toggle this ON if you are planning on using our APP on a touchscreen. This setting will make small adjustments to how our APP works in conjunction with a touchscreen.
- Analytics - Toggle this ON if you need analytic data from this particular player. Read more about Analytics
- Display Orientation - This option should only be used if your player operating system does not support changing the orientation as we recommend the adjustment on an operating system level instead.. You have the option of portrait (Clockwise) and portrait (Counter-clockwise).
- Website rendering engine - Our app comes with a pre-packaged Chromium engine and by default the websites are rendered using the prepackaged browser, however, you can change this and use the system engine instead, then websites will be rendered using the default browser that is configured as the webview engine in your Android device. The prepackaged browser works well for most users so there should not be a need to change it unless there are problems with specific website rendering.
- UserAgent - UserAgent is a piece of text that browsers use to identify itself to the web server. Certain websites will render a mobile view if they detect Android userAgent, although the site is displayed on a big screen. With this option, you can work around this issue and spoof a desktop computer's UserAgent. The UserAgent lets you pick Default, Mobile, Desktop, or Custom.
- Reload player every day at - It is good practice to clear the cache on the player once every 24 hours. Here you can set a time that is not inconvenient, for example at night when no one is watching your TV. Rooted devices will be rebooted, unrooted devices will simply restart our app.
- Tags - If you are using tags they will be listed here. You also can find and add a tag.
- Clear cache - In case you need to clear the cache manually you can do that here. For example, if you are changing your content continually and you experience something not working as expected, clearing the cache should help as it removes any old data stored on the players' storage.
- Transfer Screen - Move screens between teams without deleting or re-linking—Transfer Screen makes screen management simple and efficient. Learn more
- Reload - Reloading your player is similar to clearing the cache. In addition, reloading will close and start the APP.
- Status - Status tells you if the APP is connected to the cloud. Green means you are connected and red means you are not connected. If you see a red status you should check the internet and wifi connection to your player.
- Device Time - The device time tells you the player's time and date. If the device time is wrong it will also be wrong in our APP and thus all time-related scheduling will be off, so make sure to correct the time on the player operating system if you are having problems.
- Resolution - The resolution is the resolution according to your player's operating system. If the operating system on the players tells us it's running HD, your content on the TVs will be optimized for HD. Please note that many devices that are advertised as 4K can only decode video in 4K but run apps in a lower resolution. This means you may see a lower resolution reported by our app, but any 4K video that you use will be still played as 4K. If you are seeing a lower resolution, you can install a 3rd party "resolution checker" app on the device to confirm the resolution from another app as well.
- Version - This is the version of our APP
- Screen ID - Also referred to as UID. The UID is the unique ID for your player.
- Disc Usage - Disc usage will tell you how much data has been used on the player's storage. We do not recommend more than max. 80% storage use.
- Android Settings - This is reserved for developers only
- Screen edges - In case you have a LED screen, video wall, or an older model TV you might have to adjust the edges so that they match your TV and the content.
- Browser - Here you can easily access the browser used by the APP to check content, connectivity, etc.
- Reset - If you need to unlink your player or perhaps link the player to another account you can use reset.
Exiting kiosk mode
If for some reason you need to exit kiosk mode (f.x connect to the new WiFi network), you can do so by pressing CTRL + ALT + S during device boot (Press this combination several times when the device boots so you don’t miss the short time window).
Why is the kiosk mode recommended?
Kiosk mode ensures that our app (extension) is launched on system startup and is kept running. This means that if the system restarts (due to power loss, crash, etc…), kiosk mode launches our extension again whereas without kiosk mode you’d have to launch it manually every time the system starts up.
Google is shutting down Chrome apps, what happens then?
Google started shutting down Chrome apps back in 2018 but has delayed the process several times. This has understandably made some users uneasy about choosing Chrome for their player software. The apps won’t be shut down overnight and the process happens in several stages, your already installed app will still keep on running. The Chrome apps will be succeeded by a Progressive Web App (PWA) technology and we have the successor ready to be released should the shutdown eventually happen, so you can continue using the player in any case.
I got my screen linked, what next?
We recommend checking out our Getting Started video.
Design your contentHow do I set up the display in portrait mode?
See our portrait digital signage guide.
My device is connected to the Internet but the app can not connect.
This issue is actually in ChromeOS and is extremely rare – try reloading policy registration. If this does not work, try resetting the device to factory defaults.
How do I update Chrome digital signage?
Chrome digital signage will update the extensions automatically, however, it is also possible to trigger the update process manually:
- Launch Chrome and navigate to chrome://extensions (paste this address to the URL bar).
- Turn on developer mode in the top-right corner.
- When developer mode is turned on, additional buttons are shown. Press the button “Update”.
- If there’s an update, it will be downloaded and installed in the next few minutes.
How do I access OPTIONS if I disabled the top menu bar?
In the APP options, you can hide the top menu bar if you for example are running a touch screen. To access the top menu bar, when hidden, you can use CTRL + O for options or CTRL + Q to close the APP.

Get started designing your content
Most people think designing content for digital signage is super difficult, but if you can use Powerpoint, you can also create and design your own content in our editor.